|
My daughter has caught the hand embroidery bug! :) After watching her struggle to carry all of her supplies in everything from a plastic shopping bag to a small tote, I remembered a project that a friend and I made years ago. I revamped it a bit and made one for her. Just in case you've caught the same bug, or know someone who has, I thought I would share it with you too! 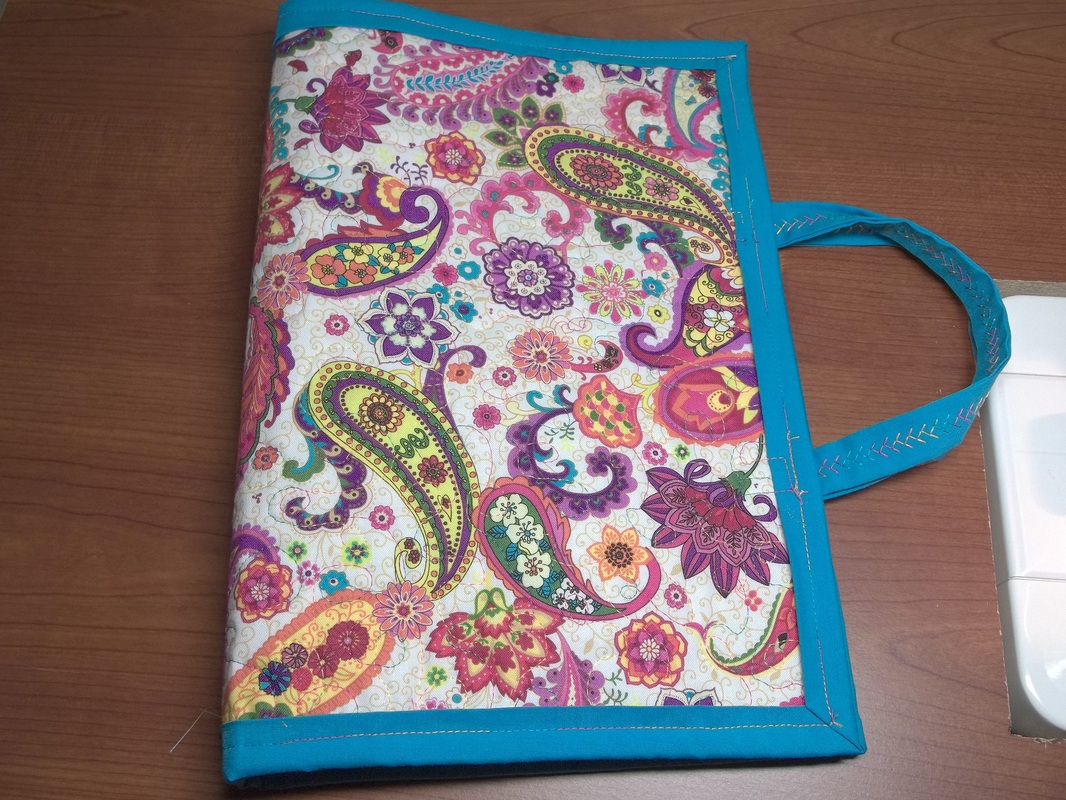 What's inside? :) 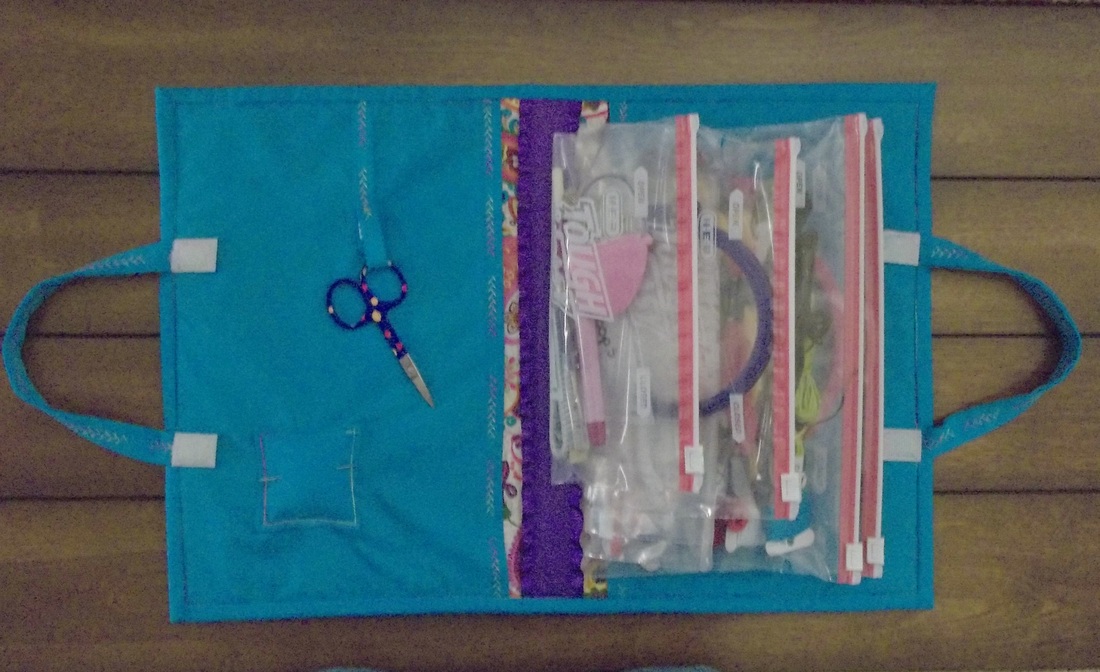 All filled up! When my friend and I made these, we used quilted place mats and the coordinating napkins. Since those are long gone on the style spectrum, you get to use whatever fabric you want and practice your free motion quilting! :) Here's what you'll need: 2 pieces of fabric 12 1/2 x 18 1/2" 1 piece of thin batting 12 1/2 x 18 1/2" 2 pieces of coordinating fabric for the interior pockets 9 x 12 1/2" 2 pieces of coordinating fabric for the handles 3 x 12" 3" square of coordinating fabric for pincushion approximately 70" of prepared binding (just like you would make for a quilt) or you can use double fold bias tape 4 quart size freezer bags (slider style works best) 2 gallon size freezer bags (slider style works best) 14" long piece of wide ribbon (to cover the seam of the bags, I used ribbon about 2 inches wide) 7" long piece of 1/2" wide ribbon for scissor loop 3 inches of sew-on style velcro (make sure you have both sides) small amount of polyester fiberfill to stuff pincushion temporary spray adhesive (I love KK2000) Blue Painter's tape a Teflon presser foot or some Scotch tape coordinating threads (I used Sulky PolyLite threads)  To begin, I made a quilt sandwich with the front and back pieces of fabric and the batting in between. Instead of pinning the layers together, I used Sulky KK2000. I free motion quilted edge to edge with a loopty-loop pattern (my daughter's favorite). I chose a gorgeous variegated thread called Confetti for the top and the bobbin. Fold the rectangle in half, short sides together to find the mid-point. Use a straight pin to mark the center at the top and bottom of the long sides of the rectangle. You will use these as a reference point later.  Next, I layered all of the freezer bags how I wanted them and used the painter's tape to hold them in place. (If you have never used painter's tape in your sewing projects, I suggest you run right out and get a roll! :) It is wonderful to temporarily hold things in place that can't be pinned and doesn't leave a sticky residue.) To make this step easier, start with one of the gallon size bags and position as desired (I placed it about an inch from the top and bottom edges and about 1 1/2" from the right edge to allow room for the binding and handle later.) Then I taped it in place. Layer the other gallon size bag on top, just slightly below the other bag so that the sliders don't touch and tape in place. Now continue with the quart size bags. You can see in the picture above how I made sure to stagger the sliders a bit so they wouldn't overlap, causing extra bulk. At the end of the taping, you will have bags taped to other bags. That's okay. The tape can be easily removed once you are through sewing the bags in. Your bags should also extend past the mid point of your quilted rectangle--the imaginary line you marked with pins at the top and bottom.  Next, you will sew the bags in place! To make this easier, you will need to use your Teflon foot or modify a presser foot you already have. I used my clear presser foot that is normally used for decorative stitching. I took a piece of Scotch tape and placed it on the bottom of the entire foot. Then I used the tips of some tiny scissors to poke out the hole where the needle goes through. This tape will make the foot glide over the plastic bags, so they won't snag and you can sew a nice seam. 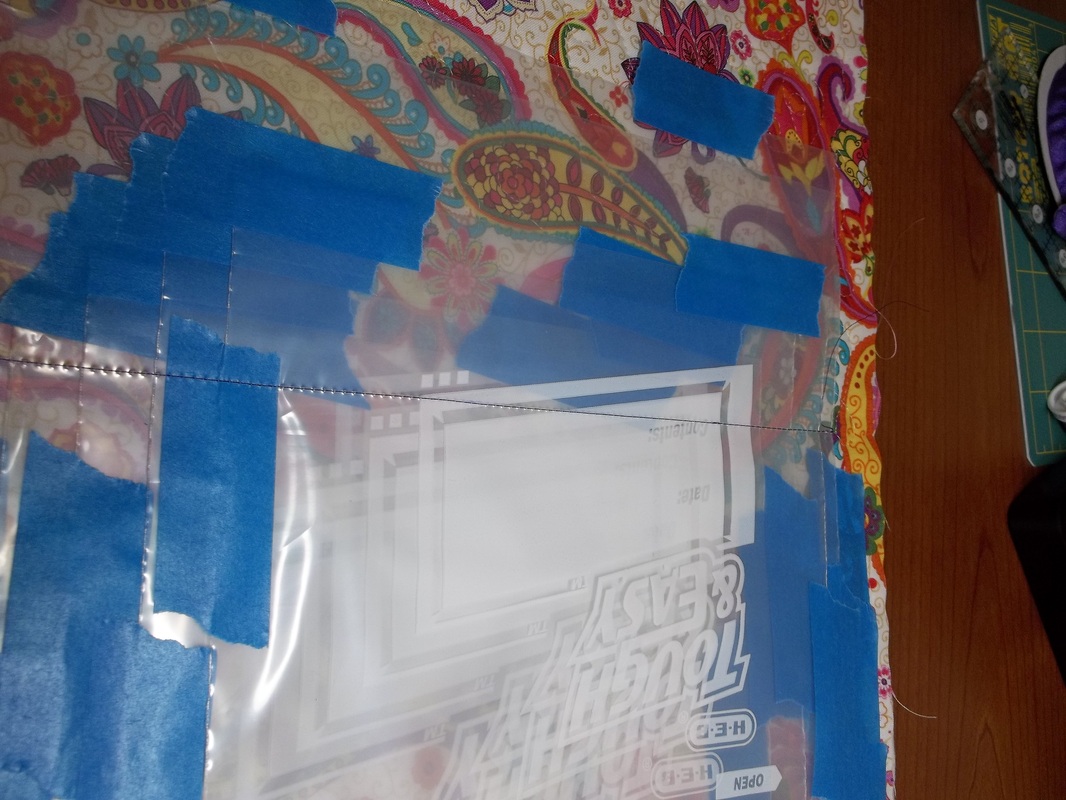 Line up your needle with the pin at the top of the rectangle. Lengthen your stitch length a bit to compensate for the bulk and sew a straight line to meet the other pin. 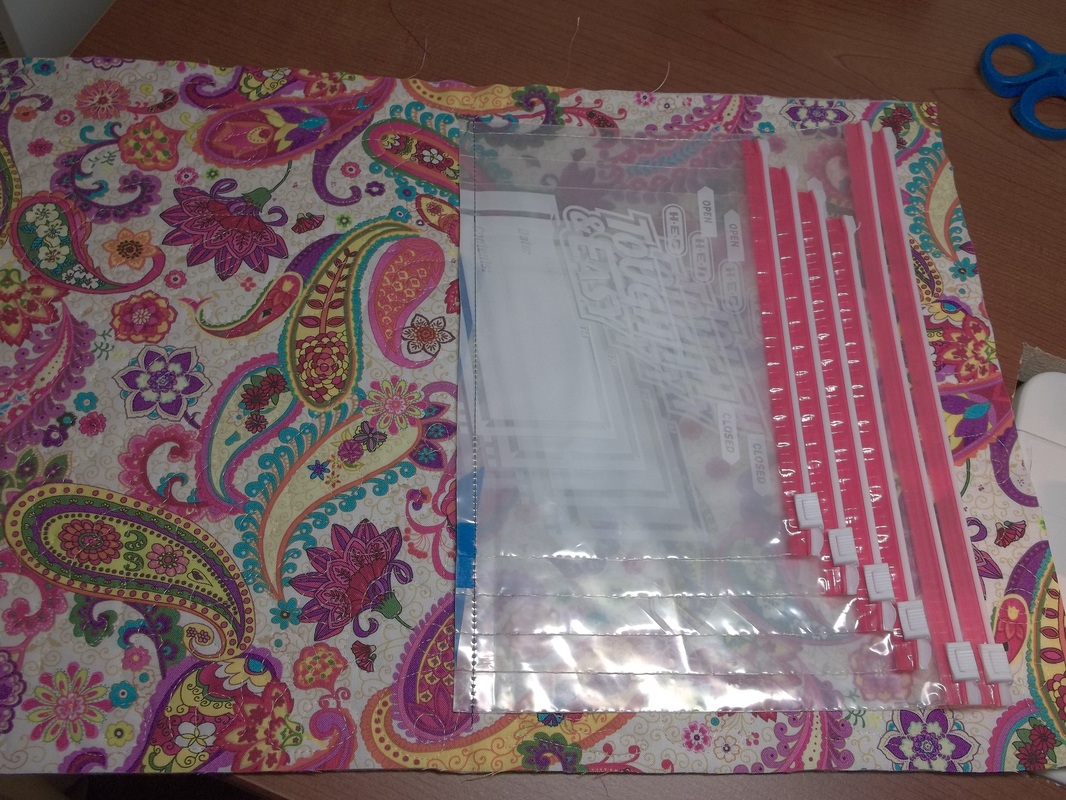 Trim the excess portions of the bags down to about 3/8" to the left of the seam. (Don't use your good fabric scissors for this step!) The photo on the left shows the carrier after the seam has been sewn and the bags cut. 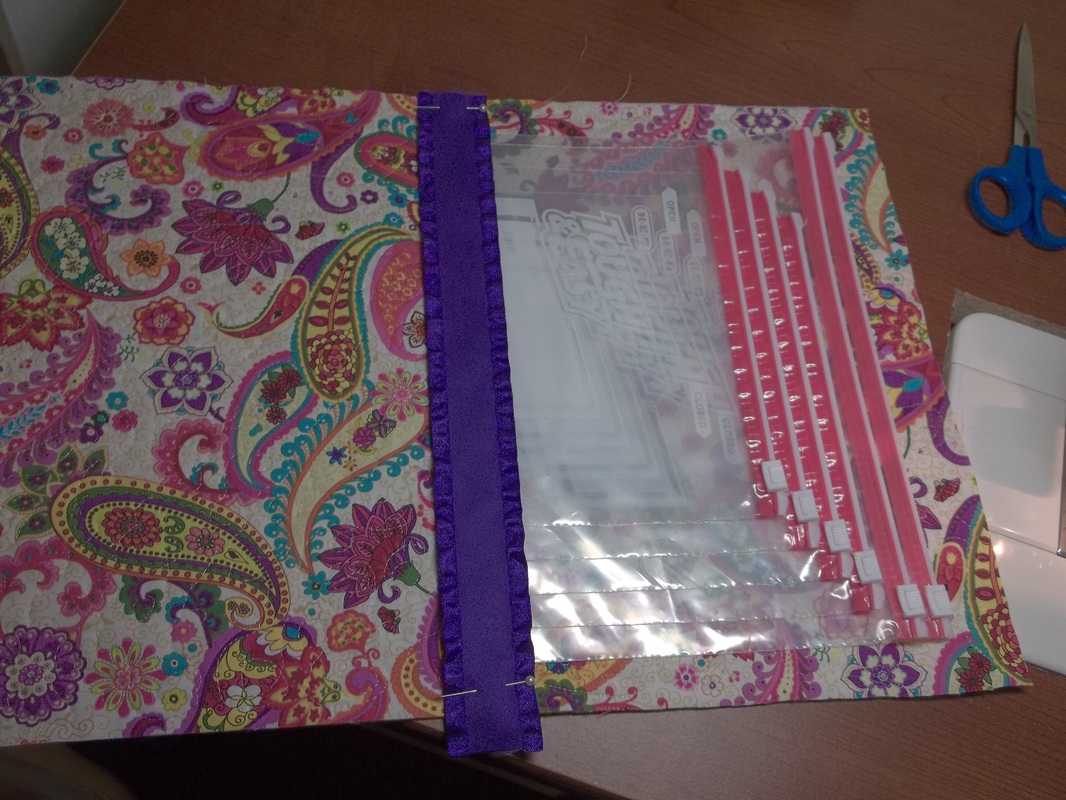 To hide the seam and the raw edge of the cut bags, stitch the wide ribbon in place. I pinned the ribbon in place at the top and bottom of the rectangle. Then I used a solid purple PolyLite thread to match my ribbon in the top and the variegated Confetti in the bobbin. To make stitching on the ribbon easier, I used the same foot with the tape that I had used to sew the bags down.  Don't worry about the edges of the ribbon extending past the top and bottom of the rectangle. This will all be trimmed prior to adding the binding.
I'll stop the tutorial for now and give you a chance to share it with your friends, gather your supplies and get to this point. If you have any questions, please let me know. I'll be happy to help! :)
0 Comments
Your comment will be posted after it is approved.
Leave a Reply. |