|
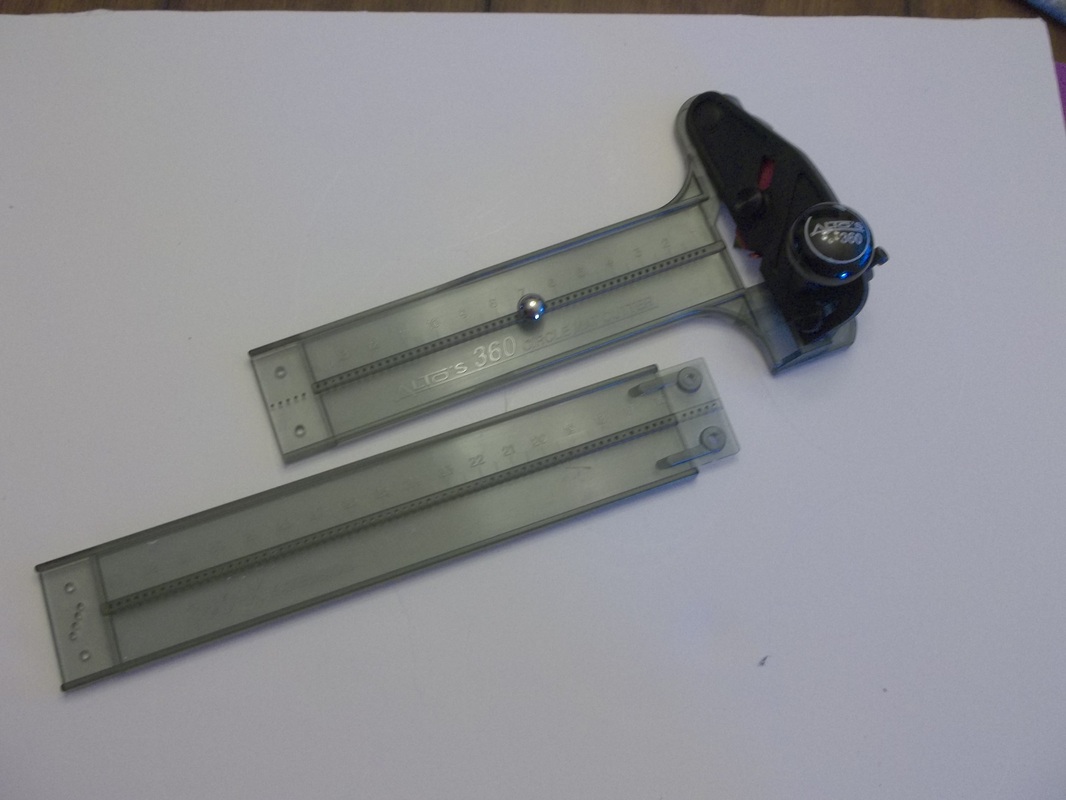
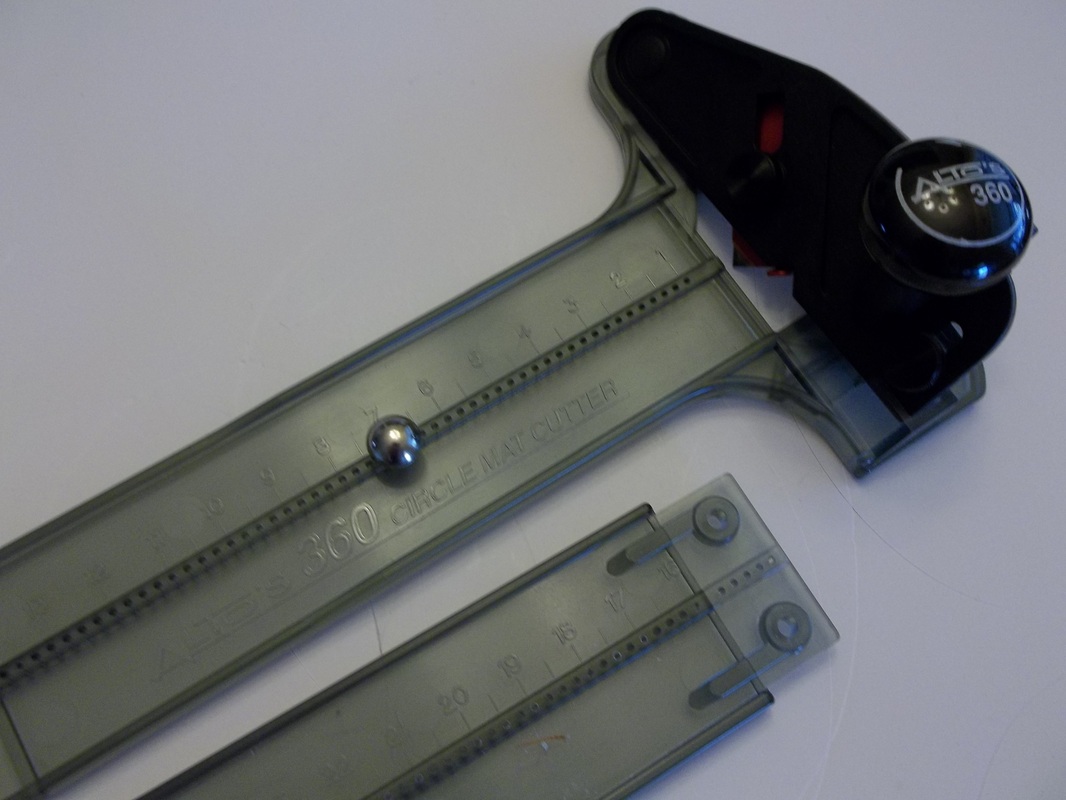
For my latest project idea, I decided to cut some circles. So, I went through my options: I have one of those specialty rulers to cut circles. You know the ones I am talking about. You have to fold the fabric and then place the ruler on top with the bottom lined up on the fold. Then you use a small rotary cutter in the slot to cut a half circle. Move the ruler aside and presto! You have a circle! Well at least you're supposed to have a circle. What I normally end up with is a "pretty good" circle with these little pointy tips at the fold mark on either side! :-) 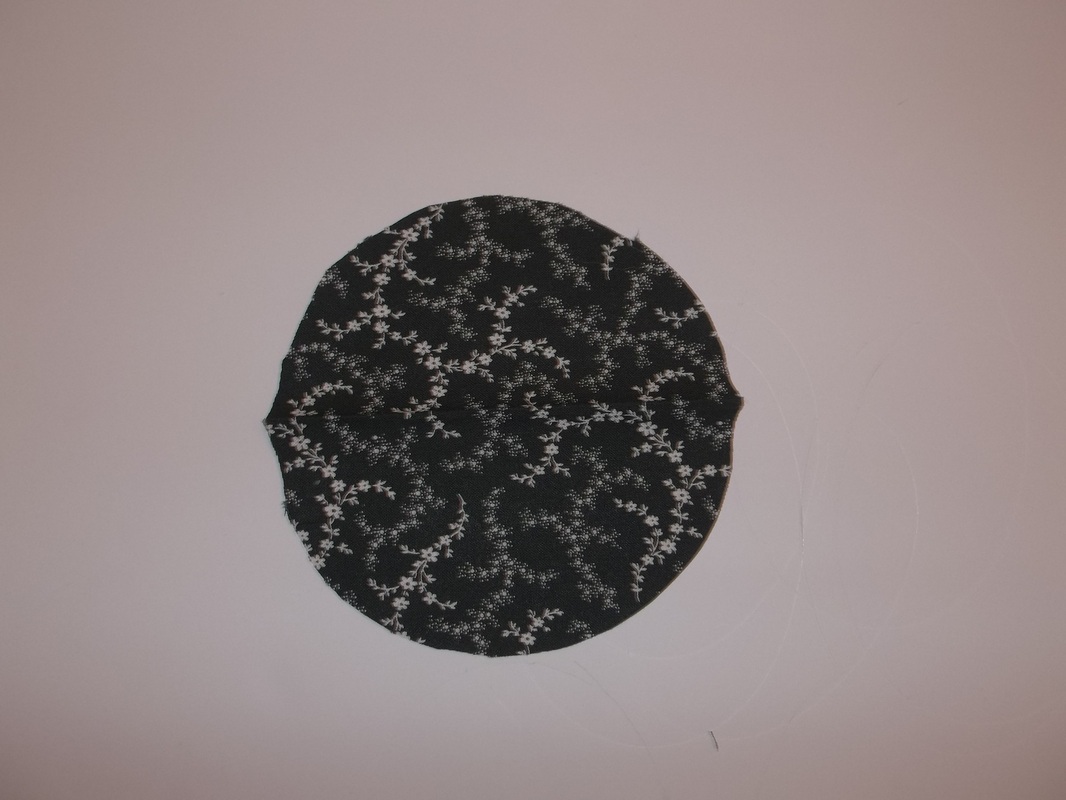 See what I mean? Then there's always the "trace around something" method. But that involves the extra step of tracing and then if you need to make some more later, you have to remember what you traced around. :-)  Ever done something like this? Other options could include using a compass and cutting out a template and pinning it in place and cutting around it with scissors, or a die cut machine, but I don't have one of those and plus the sizes are somewhat limited. Well, remember the Oval Templates? I noticed that Alto's also makes a Circle Cutter. Yes, it is originally for mat board as well, but I decided to try it out. My reasoning? If the Oval Templates worked with fabric, I bet the Circle Cutter would too. Plus, I liked the flexibility in cutting different sizes...everything from 1 inch to 33 inch diameter circles. Yes, you read that right....33 inches! The picture below on the left, shows the Circle Cutter with the extension bar. The center "line" is actually filled with holes that you place the provided tack in that correspond to the diameter of the circle you want to cut. The picture below on the right shows a little more detail. I tried it out on some different materials: Cut-Away Plus by Sulky, Kraft Tex by C & T Publishing, and fabric with double-sided fusible in place. I cut on top of the same piece of foam core, I used for the ovals. Here's what I came up with:  Foam core removed to show detail. As you can see, I cut large circles and then sub-cut smaller circles to create rings, much like I did with the Oval Templates. (The largest circle I quickly free cut with a pair of scissors just to get started.) It worked great! But enough with the practice, and on to my project fabric! 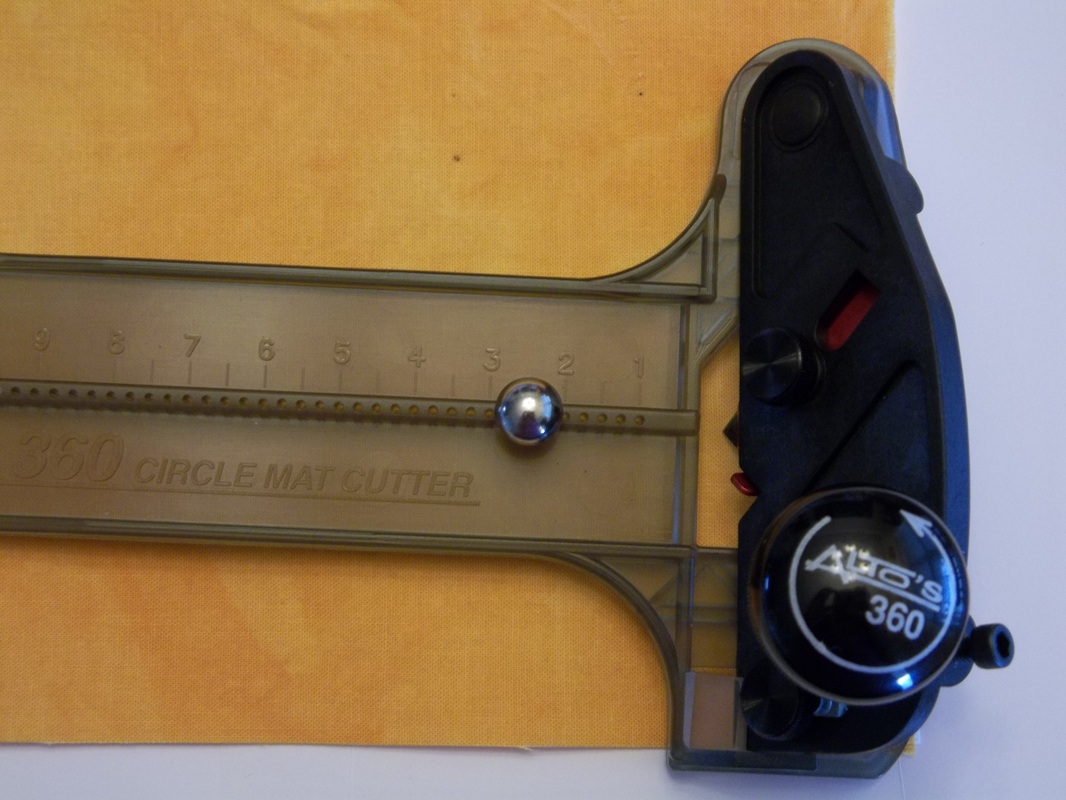 The tip of the blade is directly to the right of the center line. The tip of the blade is directly to the right of the center line. I prepped my hand-dyed fabric with double-sided fusible web and put it on top of my foam core again. Next, I placed the tack at the 2 1/2" mark and held it with my left hand, while I pushed the ball knob down and around with my right. 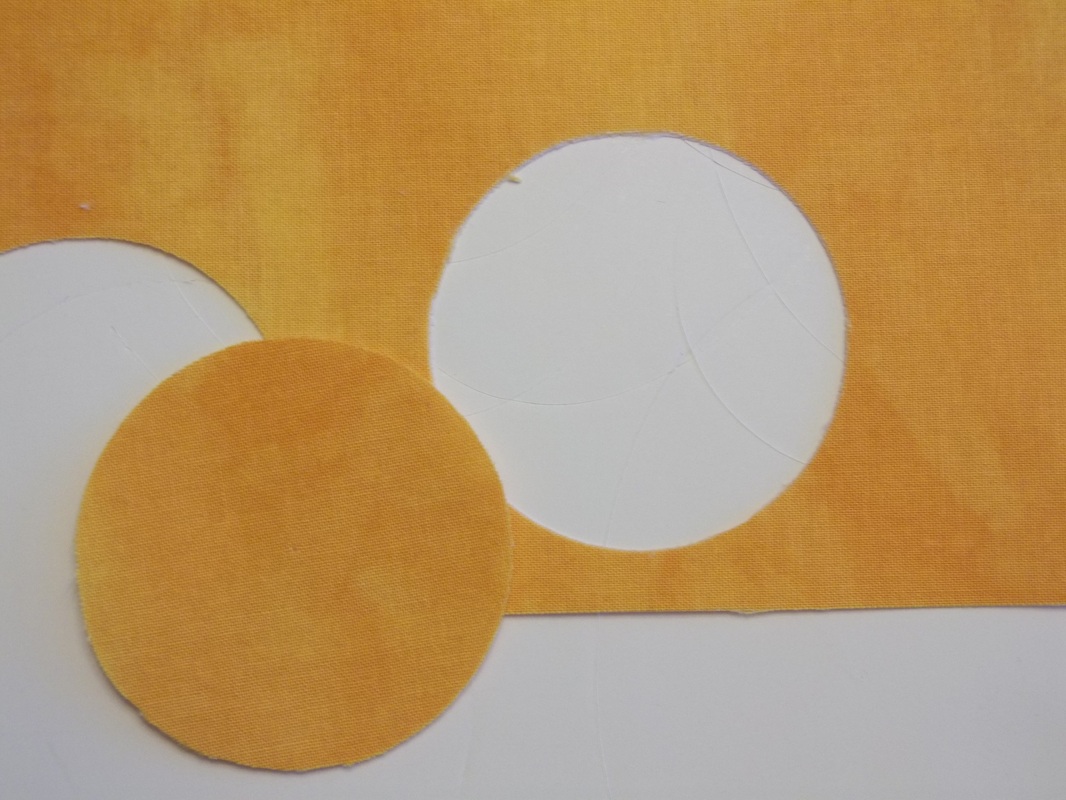 I actually got carried away and cut a few, before I remembered to take a picture! That's how easy it was! So here's one just after I cut it and the hole it left in the fabric. Added bonus? it's ready for machine applique, thanks to the double-sided fusible!  So there you have it! Circles are going to "roll" into my work a lot more often now! (Sorry, couldn't resist!) :-) If you haven't had a chance to subscribe to my blog yet, I encourage you do so! That way, you can follow along to see what I do with all of these ovals and circles! Happy cutting!
2 Comments
If you've been reading my blog any length of time, you can probably figure out that I enjoy experimenting. :-) I've had some design ideas rolling around in my head for a while now that require ovals and I had just about resorted to using the ole' template and scissor technique when I stumbled across this! These oval templates work with the included handle and blade to cut lots of different sizes of ovals and are made in the USA by Alto's, the same folks that make the QuiltCut 2. I know what you're thinking. "Katrina, um, those are for cutting mats for framing. Not fabric!" Well that's where the experimenting comes in! I grabbed some double sided fusible web and ironed it on some scraps, an old cutting mat and a piece of foam core. Guess what? The oval templates work! Just think, no scissors and no expensive die cutting machines!  Now on to better fabric! I prepped the fabric I designed recently with the fusible web and placed it on top of the foam core which was on top of my old cutting mat. This picture shows shows the handle with the cutting blade (with a spacer attached) next to the smallest oval template. 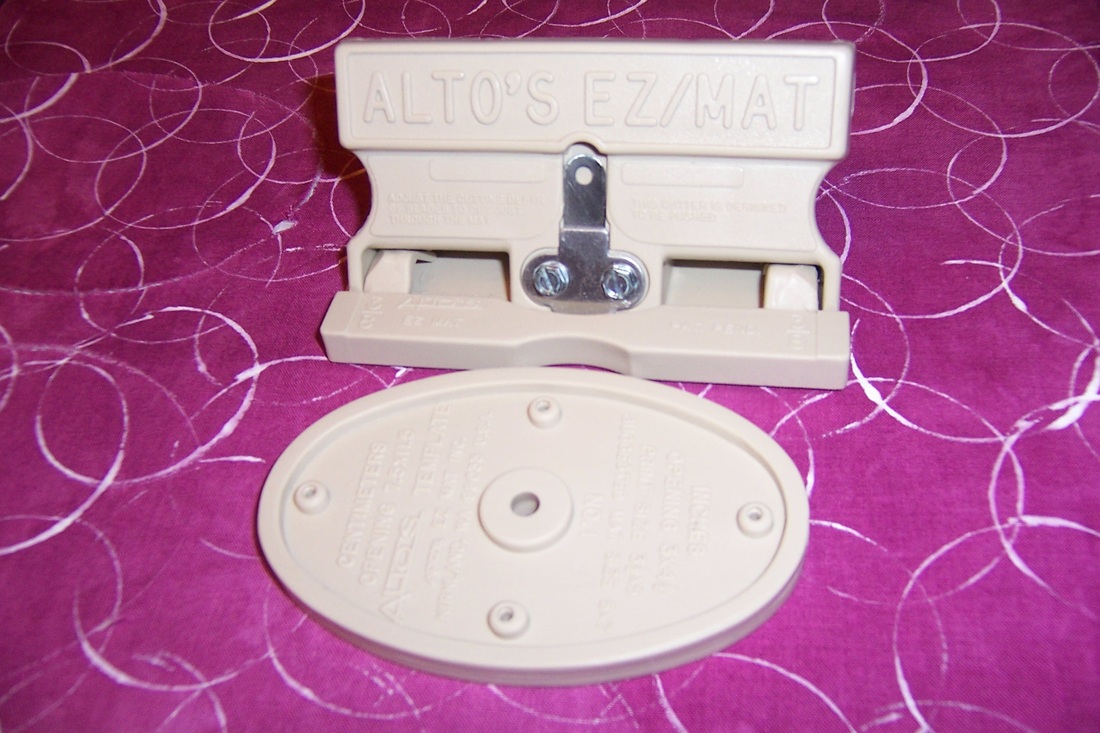 Here is a close up view. The blade is just below the silver oval plate with the two screws. Great thing about this? Safer to use! No rotary cutter necessary! Simply hold the template down with one hand and push the handle with the other. (The blade can be inserted for right or left-handed users). Go all the way around the oval. It seems like it might be awkward, but it really glides along quite easily! 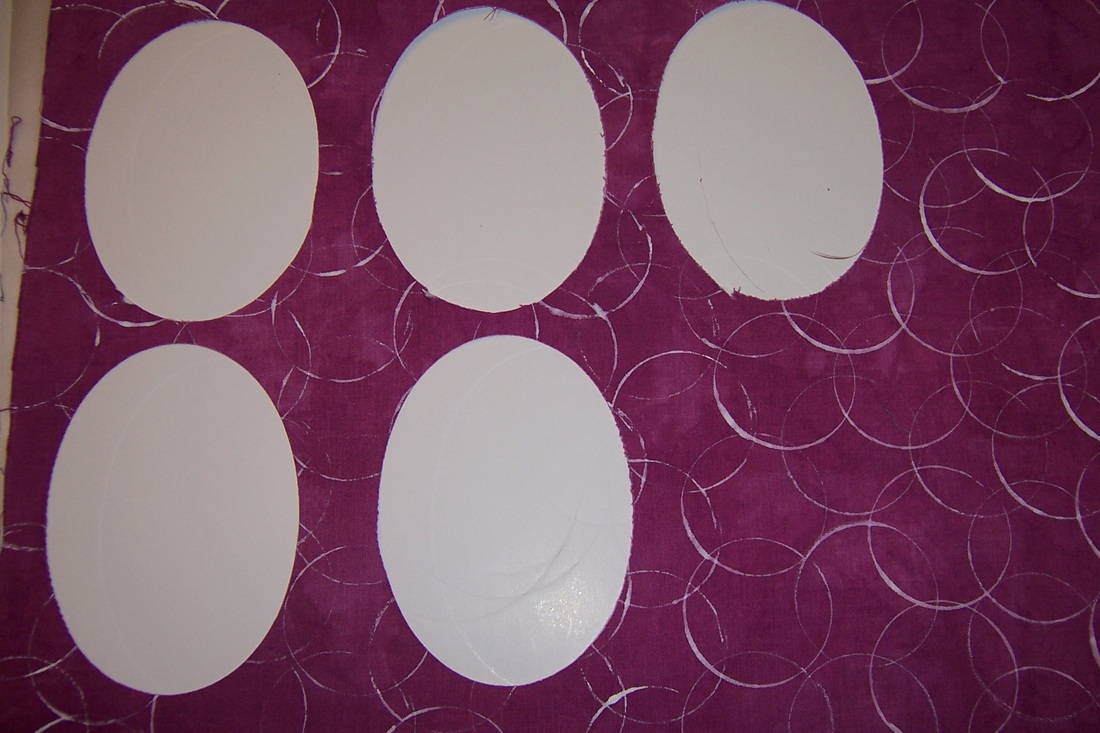 My fabric after I cut 5 ovals.  Next, I removed the spacer clipped to the handle and cut on top of one of the ovals I had already cut. Now why would I want to do something like that? 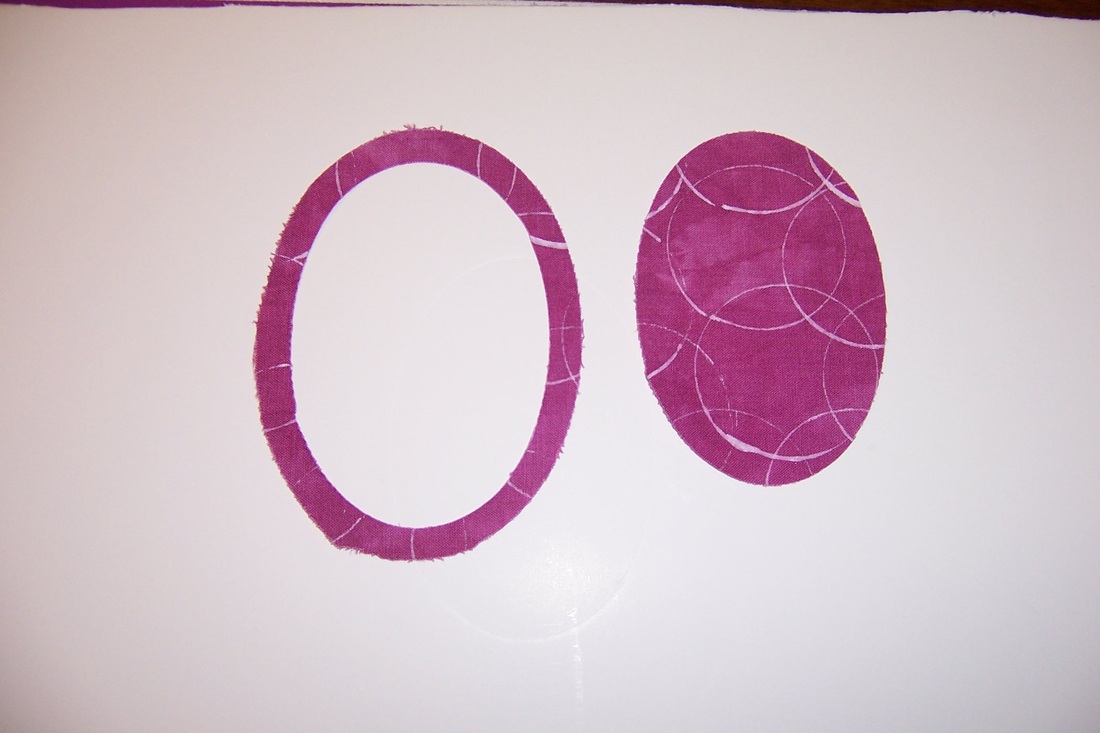 Pretty nifty, huh? I've made an oval and an oval ring!!! 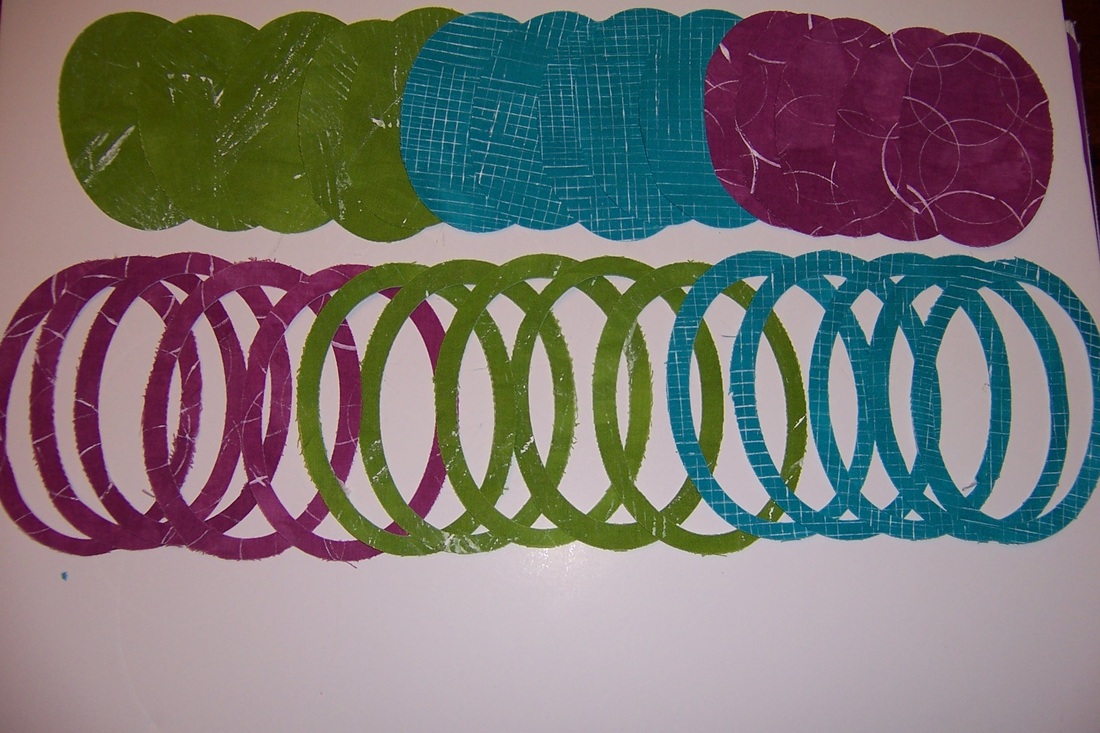 At this point, my mind started racing with even more ideas!
I prepped my other fabric and easily cut 10 more ovals and 10 more rings in just a matter of minutes! Now don't you want a set too? :-) |